This post about teaching sight reading in online music lessons was written by Rosemarie Penner. Rosemarie Penner is an analytical creative … plus online piano teacher and composer at “Must Love Music”! She loves to make learning simple, fun and interactive. When not writing articles (like this one), she enjoys reading and playing video games. For creative ideas and resources, visit Must Love Music.
Sight reading is an essential skill for students to have. But can we make sight reading fun for students when teaching music lessons online? Yes! Plus, I’ll show you how sight reading online can actually be easier than teaching in person.
When my studio moved online with the onset of the Covid-19 pandemic, there were many unexpected benefits both on the teaching and admin side of things. The one which really surprised me, though, was that my students began to love sight reading. In fact, the most common answer to “activities I want to do next term” was…sight reading!
The idea of younger students asking for these types of activities may sound strange. All I remember about sight reading when I was young was going through the exercises a few weeks before an exam, hoping for the best.
Was it the same for you as well?
Thankfully, we can make this a better experience for our students.
Online vs In-Person
While I’ll be sharing my framework for sight reading during online music lessons, this framework really started when I was a travelling teacher. I’ve learnt in these past 2 years that in-person teaching and online teaching aren’t really that different from each other. They just use different locations and tools to do the same thing.
Whether you teach online part-time, hybrid or only in absolute emergencies, my goal here is to provide a fun sight reading approach you can use in your studio today.
And I’ll do my best to make it easy-peasy-lemon-squeezy! 🍋
And for more ideas about sight reading, check out Nicola’s page devoted to all-things-planning-lessons.
Step 1: Start off the Bench
It isn’t just little ones who need to get off the bench; it’s all of our students. Even we teachers can benefit from standing and moving around during lessons.
Part of great playing comes from having fluidity and ease of movement. And that starts off the bench. In fact, it starts before ever showing our students a piece of music.
Sway with Me
Years ago, I noticed my students tended to struggle with keeping a steady pulse. This was for everything, from the first time playing a new piece to playing a piece after a week’s worth of practice: They still struggled to keep a steady pulse.
Swaying one direction might take a long time before suddenly lurching in the other and back. It was surprisingly hard for my students. By the end of a week of teaching, it hadn’t gotten any easier for me either.
Something needed to change.
First, I started just swaying to music with my students. Simple, right? Even the most rhythmically challenged student can sway. They may sway left while we sway right, but the tempo is there.
To make sure my students got the idea of a steady pulse, we did a little extra exercise.
We tried to sway without a steady tempo.
We laughed about how absurd it felt to randomly move without any connection to the music.
I jokingly said it was ‘interpretive dance’ but, if I’m being honest, I’ve seen this style of dance. We had nothing in common with that.
Swaying without a steady tempo wasn’t pretty. It didn’t tell a story or share a moment. It was just chaos.
Once my students were back on the bench, a funny thing happened. If they lost that steady tempo as they played, all it took was a little swaying on the bench to bring it back.
Moving to the Music
While I like dancing, I don’t necessarily have great dance moves. Or, at least not dance moves which work for your average sight reading exercises. That being said, swaying only gets students so far.
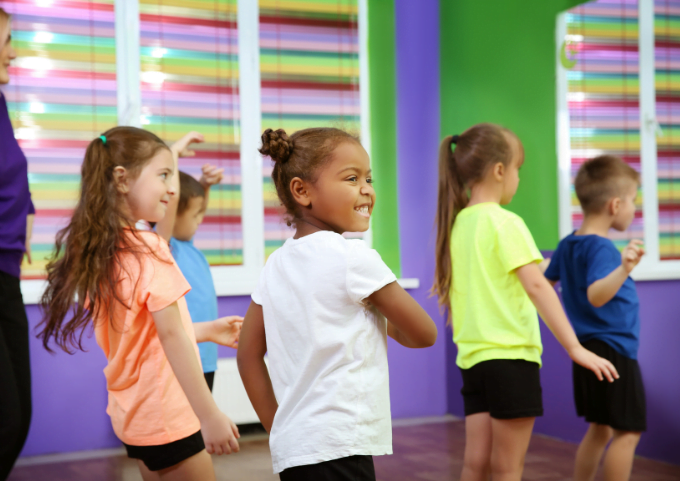
Now, if the thought of doing movement exercises feels a little intimidating, trust me – it doesn’t have to look like this:
As great of a workout as this would be, we don’t need to get this fancy. Or wear heels while running.
Movement activities can range from actions done over the course of a bar (measure), or note-specific actions which get students really moving.
I highly recommend Nicola’s book ‘Rhythm in 5’ for quick ideas to add simple rhythm movement activities into your studio. After bringing this resource back from the Teacher Turboboost conference, the activities became a quick hit in my studio.
You could also create something unique for a student. One of my dino-loving students always looks forward to the Piano Safari sight reading cards because we’ve given each note a specific dinosaur and action. Plus, it’s a great (and much-needed!) mid-lesson break which gives him a chance to move around.
If you’re a member of Vibrant Music Teaching, you can grab the ‘Rhythm in 5’ book and access the associated video course as part of your membership. Not a member? You’re missing out on printables, courses and so much more…check it out, then join today!
Whether you choose to purchase a resource, pull a rhythm from your sight reading book or create your own ideas, make sure to move from steady pulse to specific rhythm before heading back to the bench.
For added fun and to really help that steady tempo sink in, add a drumming app or backing track.
We always want to create a connection between what students do both off the bench and while playing. This can be as simple as using a sight reading resource to a full studio-wide theme (like I’m doing this year).
Online Off-the-Bench Tips
When teaching online music lessons, I make things as easy to see and follow as possible. I started off by counting us in – but with various degrees of internet lag, students found it difficult to follow along.
On a whim, I added some music one day. It was the missing piece for getting us matched up.
Here are a few tips to make the most of sight reading rhythms in online music lessons:
- Make sure the music comes from your side of the call.
- Choose pop and rock music on YouTube.
- Make actions big, starting with big muscle groups.
Your students will want to follow your lead. Keeping audio on your side of the platform automatically matches up the music with your movements. No guesswork on their part.
From a pedagogical point of view, pop and rock genres have a strong pulse to help students internalise both the strong and weak beats. Plus, you’ll save admin time since these are the genres most likely to show up in the ‘Explore’ section of YouTube.
Lastly, depending on the size of your student’s screen, they may not see subtle movements. Using big muscle groups warm up the body while also making it clear what you want students to do.
Step 2: Create a Bridge to Sight Reading
Swaying and channelling Beyoncé (if you’re feeling especially brave) starts a strong foundation for building great sight readers. But it’s just the first step.
We need to create a bridge between movement and what students see on the page.
With the same rhythm we used off the bench, have students improvise. You can choose to have students play:
- Solo improv
- Duet improv, with an accompaniment pattern you play
- Using a prepared backing track
And again, start simple by asking students to:
- Play the rhythm on one note with a steady tempo.
- Have them add one more note to their song.
- Ask them to add another note to their song.
- Repeat step 3 until either you or your student feels there is enough variety (I usually stop at 5 notes.)
As students add notes to their song, you can decide the structure.
One of my students surprised me by choosing notes which were over an octave apart for his 2-note song. At first, I was going to correct him. Then, I realised there wasn’t a need. He had followed the “rules” and we had a great talk about how melodies tend to work.
He’s since gone on to create some awesome music because I gave him the freedom to explore.
Online Bridge-Creating Tips
- If you’re playing an accompaniment pattern, get your student to mute their mic. This allows them to hear both your part and their playing.
- Record accompaniment patterns directly during lessons to save on admin time. Just make sure you can save it within seconds to your shared platform of choice so students can use it during the week.
- Talk – at your student’s level – about what makes great music. Always bring it back to what they improvised.
Step 3: Sight Reading Music
While it may seem like we’ve taken a long time to get to actually sight reading music, the above steps can be done in as few as 5 minutes. And they provide a structured background which you just can’t get by plunking music in front of a student.
With this framework, you’ve taken care of the 2 most common problems students have when sight reading:
- Keeping a steady tempo
- Playing with the correct rhythm
By the time your student sees the music for the first time, 2/3 of the work is already done – meaning that piece of music went from stressful sight reading to fun sight reading.
When your student sight reads a short piece, we want as many elements in place before they ever touch a note.
After they play, give them an opportunity to say what they would change. Then, let them play again. There’s no rule saying sight reading a piece can only happen once!
I love Nicola’s approach to using a rainbow. Not only is it colourful, but it also makes step 3 much less stressful. Why? Because it focuses on what your student already knows.
Online Sight Reading Tips
I happen to think sight reading is where online music lessons really shine. If you’re using the same sight reading resource for multiple students, you may not want your students to mark it up with many different colours – and that’s okay!
Since this is the case in my studio, I have PDF copies of the sight reading materials ready before lessons. It’s as simple as screen sharing or uploading to a program right before lessons. Or, if you teach in-person, just have your iPad ready on the piano.
Use screen annotation so students can highlight or circle:
- Scales
- Chords
- Landmark notes
- Skips vs. steps (or other intervals)
- Accidentals
- Dynamics
- Articulation
For younger students, landmark notes and skips vs. steps may be enough. For older students, marking chords and accidentals outside of the key signature may be more appropriate.
At the end of the exercise, annotations disappear and the music is ready for whatever my next student needs.
Focus on Fun
Think back to your experiences of sight reading as a student. Was it like mine? A piece of music appears and you did your best to stumble through?
It doesn’t have to be like this.
Instead, let’s focus on fun sight reading, using movement and improvisation to lead your student to a new page.
What are your students’ favourite sight reading activities?
Whether you channel Beyoncé or prefer a less intensive approach, I’d love to hear how you make sight reading a favourite activity in your studio. And, if this was a bit of a “mind blown” type of read 🤯, let me know your favourite idea in the comments below.