
This post about how to teach piano students their right vs. their left was written by Carmen Carpenter. Carmen has taught music in a school setting as well as in her home studio for over 30 years. Teaching combines two of her favourite things: music and kids! Besides teaching music, Carmen loves spending time with family playing games, working puzzles and watching movies. She’s also an avid reader and loves taking long walks on her local, woodsy trails.
Raise your right hand…no, your OTHER right hand. 🤪 If you have piano students who struggle with knowing their right hand from their left, these 10 ideas will have them doing ‘The Hokey Pokey’ in no time flat!
Left vs. right is an abstract, somewhat arbitrary concept. It isn’t fixed in space like north or south, or even up and down. Therefore it can be really hard for kids to nail down which hand is their left and which is their right.
I didn’t realise how many of my students couldn’t tell their right from their left until I started teaching online during the early part of the Covid-19 pandemic. I’d say, “Play that scale with your right hand.” The student would put up their left hand or stare blankly, or wave at me and ask, “this hand?”
Communication broke down since these students didn’t know how to apply the terms “right” and “left” consistently.
Left-Right Confusion
Did you know this condition has an actual label among scientists and educational experts? It’s called “left-right confusion”. (Creative, no?)
As professionals who depend almost entirely on hands for our work, it’s vital to do all we can to help our students grasp which hand is which.
Understanding right from left employs several cognitive functions. In Psychology Today, Sebastian Ocklenburg, Ph.D. describes what’s required to differentiate right from left.
- Verbal processes (applying the words “left” and “right” to objects in the environment)
- Memory (remembering which is left and which is right)
- Spatial processing (processing whether objects around you are on the left or the right side)
If the integration of any one of these different processes fails, left-right confusion can happen.
Why should students know right from left?
Accurately naming right and left is widely considered a necessary life skill. As music teachers, we aren’t just teaching music; we are teaching life skills.
I don’t know about you, but I prefer my students to put on and tie their own shoes (which requires at least a basic grasp of right and left).

I also know that one day these kids will be driving, and I’d like to share the road with people who know which way to turn when their navigation system tells them to!
But there’s more than these day-to-day life skills to think about when you’re trying to effectively teach your piano students right vs. left. Consider these situations:
- Online lessons: It’s frustrating to always have to say “the other hand” or give them a solid vantage point, such as “the hand closest to the wall”.
- Music with the same clef for both hands: Although clefs are a way to clearly communicate which part you’re directing a student to play, what will you do when they play music that has two treble or bass clefs?
- When hands need to cross over: Knowing which side of the keyboard is high and which is low can help in the communication effort, but what happens when the hands need to cross each other?
When you think about circumstances such as these, it becomes clear that students must have a solid grasp of left hand-right hand to be successful in piano lessons.
For more awesomeness on teaching piano technique, check out the ‘Technique’ section of the Colourful Keys Planning Lessons hub page.
10 Ways to Help Our Students With Left-Right Confusion
Since left-right confusion is a very real cognitive hurdle for many of our young students, we must do all we can to help them clear that obstacle. Here are some “handy” tools (see what I did there?😆) to assist them.
No. 1: Use the “Mirror Rule”
You may already know that young children tend to mirror the person in front of them when moving with hands or sides of the body. This is also the case for some older children with special needs.
As you make plans to help your students with left-right confusion, be sure you’re aware of this tendency when sitting opposite a student, facing them. Practise any movements with the opposite side/hand you are expecting of your student.
No. 2: Sing Songs
Songs are well-known aids for learning. Since we’re music teachers, it just makes sense we’d make music as we guide our students with left-right confusion.
🎵You put your right hand in…🎵
Have you ever learnt ‘The Hokey Pokey‘? This is a great song for reinforcing right and left. Just remember the above mentioned “mirror rule” if you’re facing your young students when singing together.
Besides ‘The Hokey Pokey‘, there is no shortage of songs and videos on YouTube that reinforce left and right. Be certain that the animations or song leaders are mirroring your student so there’s no confusion about left and right sides.
It probably goes without saying, but consider the age of your student when choosing videos.
I personally recommend ‘The Left and Right Song‘ for students younger than 8:
Students 8 – 12 or so tend to enjoy this upbeat, dance party tune:
No. 3: Compose a Song
Rather than using YouTube, encourage your student to compose a little song about their dominant hand. This will reinforce handedness which can give them (and you) an anchor for knowing which hand is which.
If you don’t want to take up lesson time to compose a song, I’m happy to have you steal this little ditty I made up. It’s sung to the tune of ‘Mary Had a Little Lamb’.
I’m writing with my right hand, my right hand, my right hand.
I’m writing with my right hand and it plays the treble clef.
My other hand is the left, is the left, is the left.
My other hand is the left and it plays the bass clef.
No. 4: Get Moving
Much like singing, movement is a fantastic learning tool. Try some of these off-bench ideas:
- Use popular line-dancing songs such as ‘Cha Cha Slide’ or ‘Cupid Shuffle’ that require moving to the right and left.
- Go outside and play hopscotch using the letters R and L to indicate which foot should jump into the square.
- Leverage body-movement games like ‘Simon Says’ or ‘Follow the Leader’ to reinforce left and right sides.
No. 5: Gamify
You knew that playing games had to come up sometime in a post from Colourful Keys. 😉 The VMT Games Library has many games that members can use to practise left vs. right.
Here are some of my studios’ favourites – and they all have screen versions you can use in online lessons:
No. 6: Connect Musical Terminology
Although “right” and “left” are abstract concepts, piano geography and the grand staff can provide concrete examples for students with left-right confusion.
As piano students begin to understand which side of the keyboard has high sounds and which has low, say the words “right” and “left” and using the correct hands to teach musical terminology and concepts at the same time as right vs. left.
Continue to connect hands and musical terms when discussing the treble and bass clefs. Most students can quickly identify which hand plays which clef – even if they can’t show you the left and right hands on command. (That’s where all these other ideas come into play.)
No. 7: Use Physical Markings
Most people know about the ol’ left hand thumb and pointer finger making the shape of an “L”. But that doesn’t always work when many young students think the backwards “L” that the right hand makes is still an “L”. For these kids, try a different strategy.
When I was a kid I had a large wart on my right pointer finger. That may gross you out, but it was very handy to know that that hand was my right, and it cleared up any confusion I had about which hand was which.
Now, of course you do NOT want to point out imperfections like warts on your students’ hands! But you can certainly do a gentle, guided discovery of their hands.
Have your student take a close look at each of their hands and ask them what they notice. If they find something unique (a mole, scar or such), guide them in attaching that feature to the hand it’s on.
If your student can’t find a useful physical detail, create one with stickers, temporary tattoos, or stamps. Use these tools for several lessons. After a while, stop using the concrete reminders. If your student later has trouble with left and right, prompt them by asking which hand they had had the learning aid on.
No. 8: Create Desirable Difficulties
The authors of the book Make it Stick use the phrase “desirable difficulties” to describe giving students intentional obstacles to produce more durable learning.
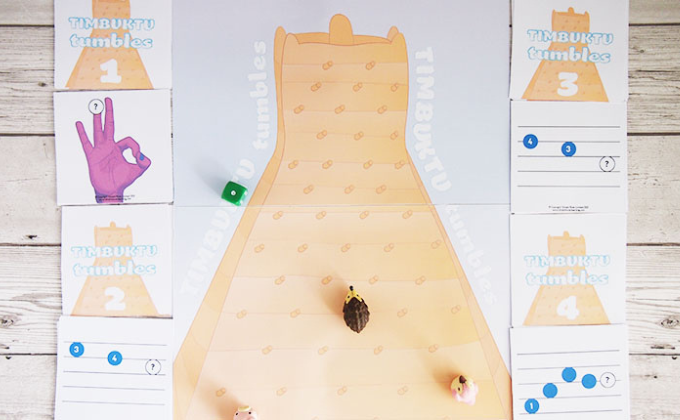
Try setting up challenges with the VMT game ‘Timbuktu Tumbles’, which requires students to problem-solve which hand to use. See if they can work it out themselves before you step in.
‘Timbuktu Tumbles’ is exclusively for members of Vibrant Music Teaching. Not a member? Visit vibrantmusicteaching.com to join the movement and gain instant access to the resource libraries.
Methods such as ‘Piano Safari’ spend lots of time in the early stages with pieces that include only one clef. Make this another “desirable difficulty” opportunity for your students by not showing them which hand they should play with – wait and see if they can figure it out on their own.
No. 9: Involve Parents
As piano teachers, we get 30 – 60 minutes on 1 day each week with a student. Parents get the rest of the time on all the days of the week. So be sure to include parents in your efforts to help their child learn left from right.
Kindly let parents know their child is having trouble with this skill, and you’d love their support in addressing it. Give them suggestions and advice like this:
- Try not to tell your child which hand is which – give them some time to work it out for themselves.
- When you ask Suzie for something, try making it specific to right vs. left (such as, “Can you give me the spoon with your left hand?”)
- Have your child lead the way on walks or trips to the shops, discussing which way they’re turning or what side of the street or aisle they’re using.
- Play games like ‘Simon Says’ to reinforce right vs. left, or get the whole family involved with a non-musical game like ‘Left Center Right’.
No. 10: Be Patient
As tempting as it may be, don’t add undue pressure to the situation by belaboring it. Left-right confusion intensifies when someone is put under stress or time constraints.
When asking for a specific hand, give your student several seconds to work out which hand is left and which is right. After waiting a bit, if they still can’t come up with the correct answer, ask guiding questions. For example, “Which hand do you write with?” or “ Which hand usually plays the treble clef?”
Self-discovery will go a long way in helping a student fully grasp which hand is right or left.
How do you teach piano students right vs. left?
What ideas have I missed? Add to my list by leaving a comment below.
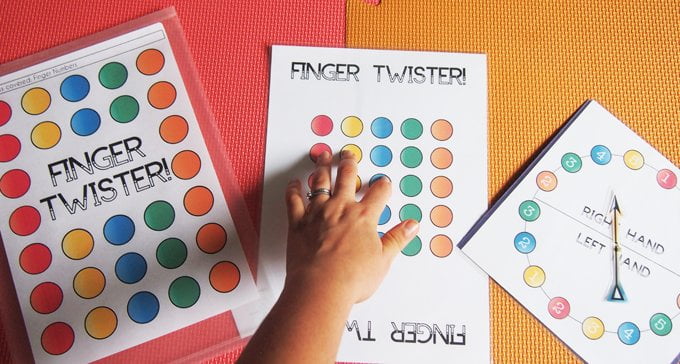
‘Finger Twister’ is a fantastic game you can use to teach piano students their finger numbers along with right vs. left. Enter your info below, and Nicola will have ‘Finger Twister’ flying to your inbox before you know it!
Subscribe to the newsletter and get the Finger Twister game
Enter your details to subscribe to the newsletter for piano teachers with information, tips and offers.
I hate spam as much as you do! I will only send you emails related directly to piano teaching and you can unsubscribe at any time.
Not a member of Vibrant Music Teaching? You’re missing out on so much pre-designed goodness and continued learning opportunities! Learn more and join today at vibrantmusicteaching.com.
These are some good suggestions/approaches for us to try! Thank you.
However, I have one adult student who is constantly confusing the 2. He knows them in life, but confuses them on the two staffs. It’s been a real challenge and embarrassing for him.
If you have any suggestions, I’d love to hear them!
Many thanks!!
Barb Claypool
I don’t have a solution but it might alleviate the embarrassment to know that we “read” left and right differently in different contexts. I was just in a percussion (djembe) class and the right hand notes were always notated lower than the left to denote not pitch but that they fell on the strong / heavier beats. As a pianist this was SO confusing and I kept messing it up, despite having years and years of music-making (& not just on piano).
Hi, Barb! I’m glad you found these suggestions helpful:) I wonder if your adult student has a solid understanding of which side of the keys is high and which is low. Would it make sense to him that the “higher” stave (treble clef) on the page is for the high keys, thus the right hand plays it? And then the opposite is true for the left hand/bass clef part?
I also think that if he’s a tactile learner, or even visual, he’d benefit from tracking each clef with the corresponding hand before he actually plays the piece. It might seem juvenile, but the brain/body/action connections might be useful.
And the “desirable difficulties” section of this article is definitely something you can set up for an adult student.
I hope that helps! Good luck!
I am an adult and music teacher who finds left and right really difficult. I will instinctively get them the wrong way round nearly 100% of the time if I don’t stop and think. The two methods I use to work it out are chanting ‘I write with my right hand’ and looking at the L my left hand makes.
You mentioned in the podcast that you didn’t think this second method would work but to me there is no connection between knowing how letters are formed and which is left and right.
I don’t get embarrassed about it at all, it’s just part of me that I can’t do it. I laugh when I get muddled and carry on, my students are used to me having to sort out the confusion when I get it wrong. I don’t think I will ever fix it at this point.
I love your attitude, Joanna! Thanks for sharing:)