Most of what determines student success is if, when and how they practice. Students generally spend at least 95% of their time at the piano without a teacher to supervise them. So my mind is always whirring with ideas to help students make the best use of this time with good piano practice strategies.

Note: The content in this article was originally published separately in February, May and June of 2014; February, April and May of 2015; January, February and October of 2016; and April of 2017. It was consolidated and substantially updated in May 2022.
When I started teaching, I fell into the trap of giving mini-lectures to my students on the importance of practice…not once did this have any impact.
Then, I came across Philip Johnston’s amazing book ‘The Practice Revolution’, which really did revolutionise the way I approached piano practice with my students. The whole time I was reading it, I was thinking “Yes! Exactly!”
(If you haven’t read ‘The Practice Revolution’, you really should! Trust me!)
Nowadays, I spend a lot of lesson time showing students how to approach different problems which crop up in the practice room.
Follow Through
Before getting into the piano practice strategies, though, I want to emphasise a very important point: When introducing any new practice technique, make sure you do it together in the lesson.
The student should leave their lesson picturing exactly how their practice will look that week.
Telling students to practise without teaching them how is like a doctor telling you to reduce your cholesterol but not telling you which foods to avoid.

So whenever you introduce a new piano practice strategy to a student, make sure you:
- Do the steps together in the lesson.
- Review the steps verbally.
- Have the student explain the steps to you and talk about how it will work at home.
- Ask the student to perform the steps again at the next lesson.
I think the great Frances Clark sums it up best in the simplest of terms:
“A student is almost always motivated to practice if he leaves his lessons feeling capable.”
Piano Practice Strategies
For the first 6 months or so, young beginners are focussing on just getting into a practice routine. Once that routine is established, though, we can start to help them make their practice more varied and – eventually – more targeted.
In this article, I’ve organised some of my favourite piano practice strategies into 4 categories. If you want to jump straight to any particular category or strategy, simply click on the link below.
…and away we go! 🙂
Preparing Away from the Piano
As experienced players, I think we all automatically see patterns in our pieces. Arpeggios, chord progressions, scales and repeats just jump out at us and our mind subconsciously reads them as one item.
Piano students, however, won’t always see these patterns. When they first look at a piece, they may just see an endless sea of individual notes strung together.
That’s why the first assignment my students often see with a challenging piece is to prepare away from the piano. This is particularly important for pieces which are going to be memorised, but also a great exercise for any piece.
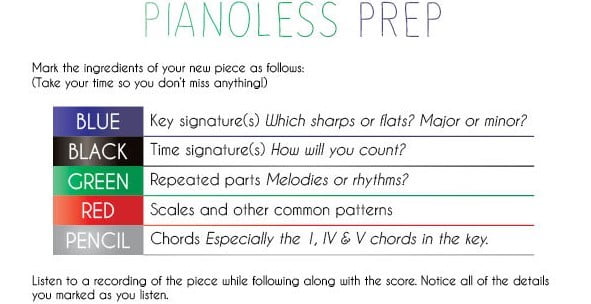
A little ‘Pianoless Prep’ guide like this sample just serves as a way to get students started with music analysis and get them accustomed to preparing away from the piano. Once they’re used to the process, they can really do it any way they want. Post-its, stickers, tabs, highlighters – whatever!
The point isn’t the finished mark-up; the point is really just to inspect the piece. And seeing the finished page with all the red & green parts which are just “gimmees” is such a great confidence boost!
Creating Sections
It’s easy for us veteran musicians to forget that we all, at some point, had to learn the cardinal rule: Going through a piece beginning-to-end, over and over, is playing – not practising.
When students begin the transition from pieces with just 7-8 bars total to ones which are longer with trickier spots sprinkled throughout, it’s up to us to help them see just how much more effective it is to work on small chunks at a time.
Sectioning Pieces for Beginner Students
When beginners are struggling with a piece – or even a particular phrase – I like them to have a battle plan to follow during the week so they can conquer the challenge.
This can be something as simple as a sheet of paper which lists the practice days with a blank space for which bars (measures) they’ll learn on each day. We fill it in at the lesson together and the student agrees to commit to it for the week, with the promise from me that this will no longer be the “difficult bit” or their “least favourite part”.
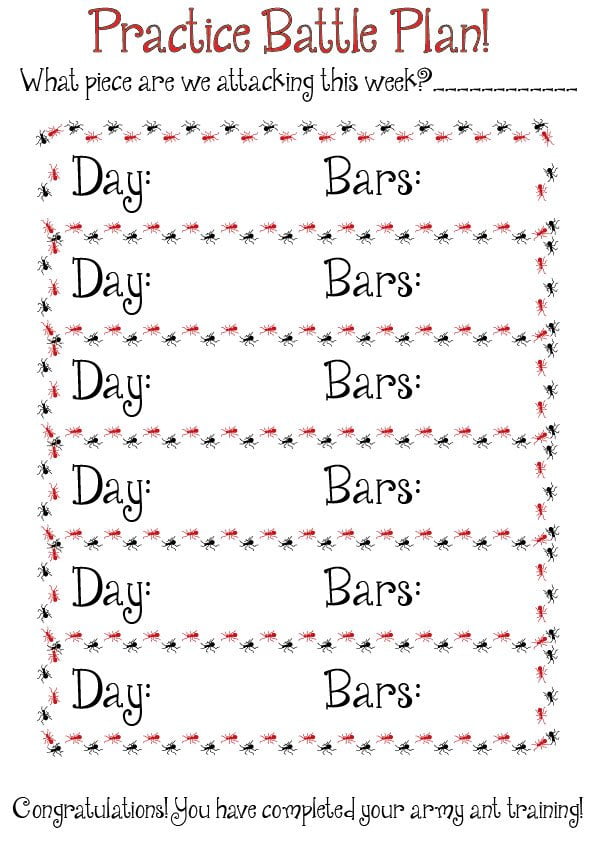
Note that I said we create the battle plan together. Don’t do it for them.
Take the extra time to create it together so they gradually learn how to section their assignments for themselves.
At the very least, if they helped set out the plan, they’re more likely to commit and follow through.
Sectioning Pieces for Intermediate Students
I can tell students to practise section by section until I’m blue in the face, but I can’t control what really happens when they get home.
Some intermediate students will still invariably waste endless practice hours playing the whole piece over and over from start to finish…slowly progressing.
Very slowly.
Two steps backward and three steps forward.
They engrain the mistakes. Learn the beginning better than any other part. And then get frustrated when, a month later, they’re still playing wrong notes.
Ok, rant over. Time to take action.
If you have students who really and truly can’t stick to the most fundamental rule of practising, you might just have to force their hand.
Step 1: Lay the Groundwork
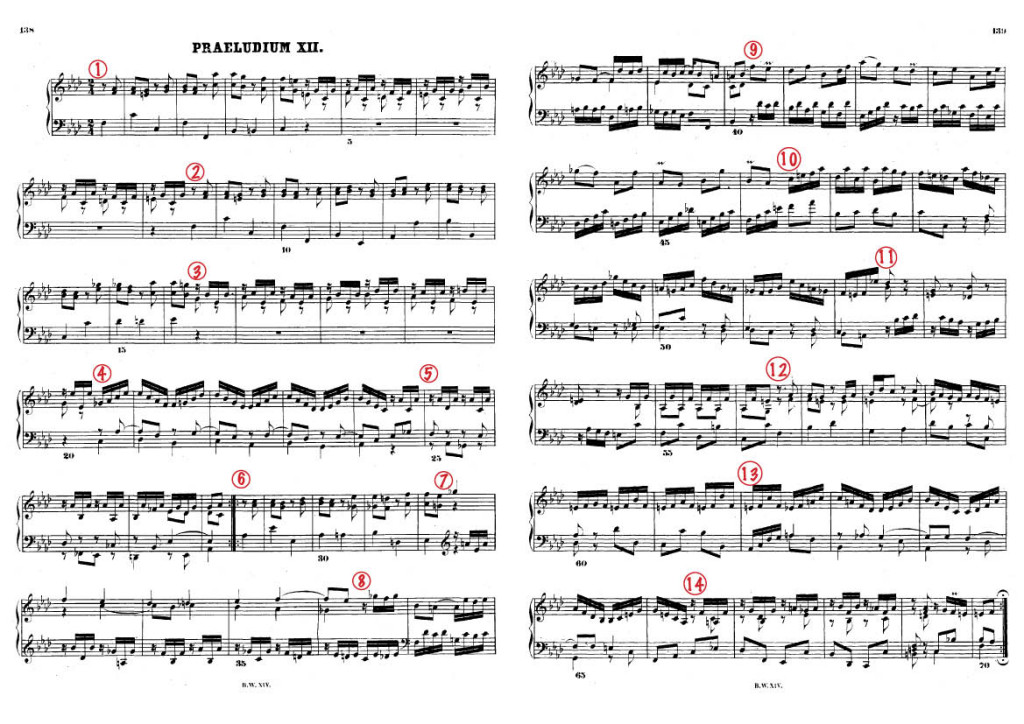
Split up the piece into manageable sections. (I’m using Bach’s Prelude in F minor from WTC Book II as an example here.)
Try to start each section at a place which is easy to play from. Phrase endings are the best choice if possible.
(Tip: Try to include the first note of the next bar at the end of your section. This way your sections will overlap and, when you put it all back together, it will flow seamlessly.)
Step 2: Put Down the Foundation
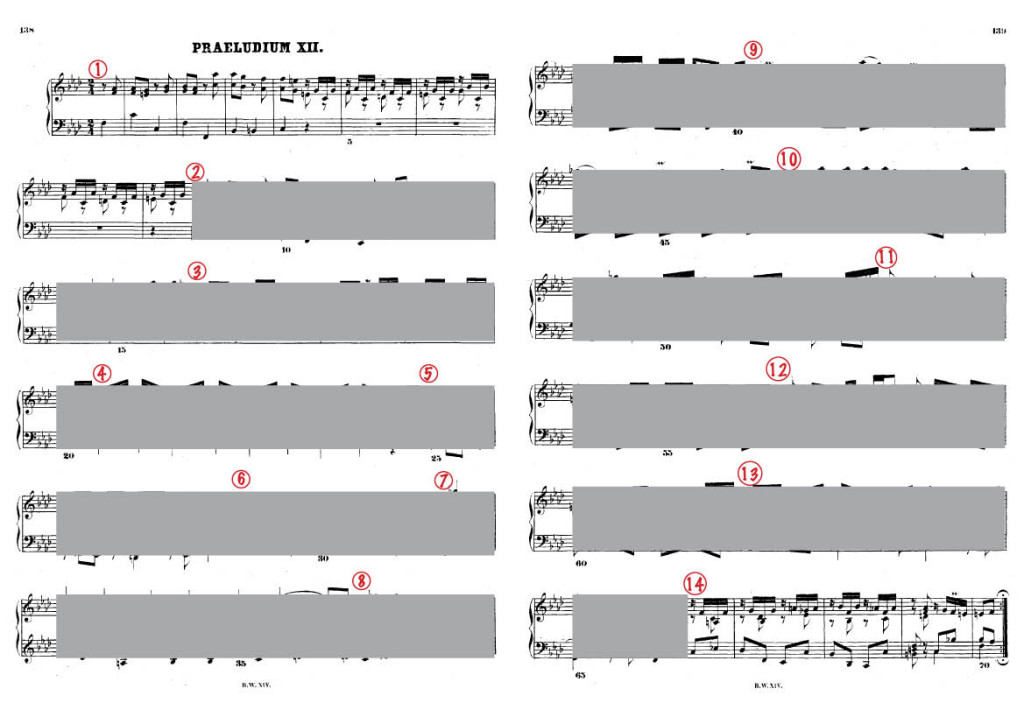
Black out everything but the first and last sections and assign them for the student to practice. You could do this with post-its, cover the areas and photocopy, or use software on your computer.
Step 3: Build it up brick by brick
Once you are satisfied that the first sections are learnt well, assign the next two sections, and so on.
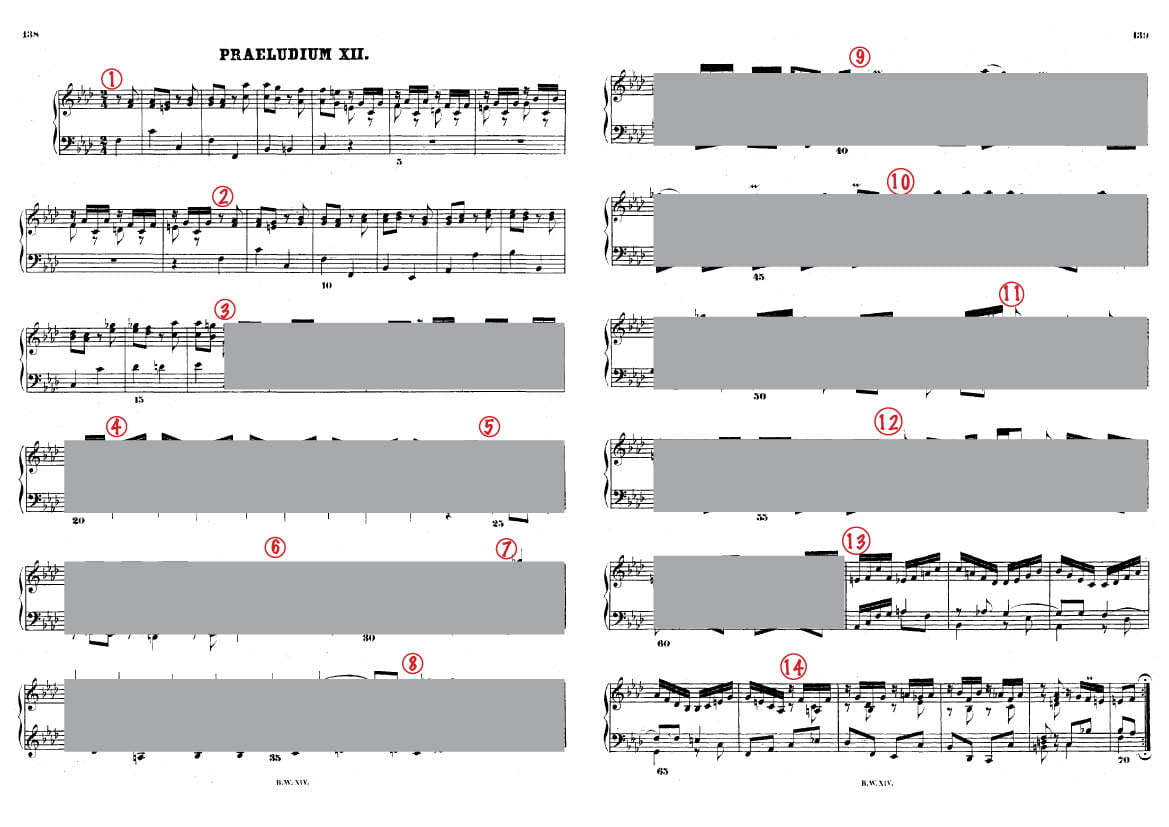
Make sure to continue to review previous sections as you go.
I prefer going from the start and end towards the middle. This way you know the start and finish of a performance will be the most secure and convincing.
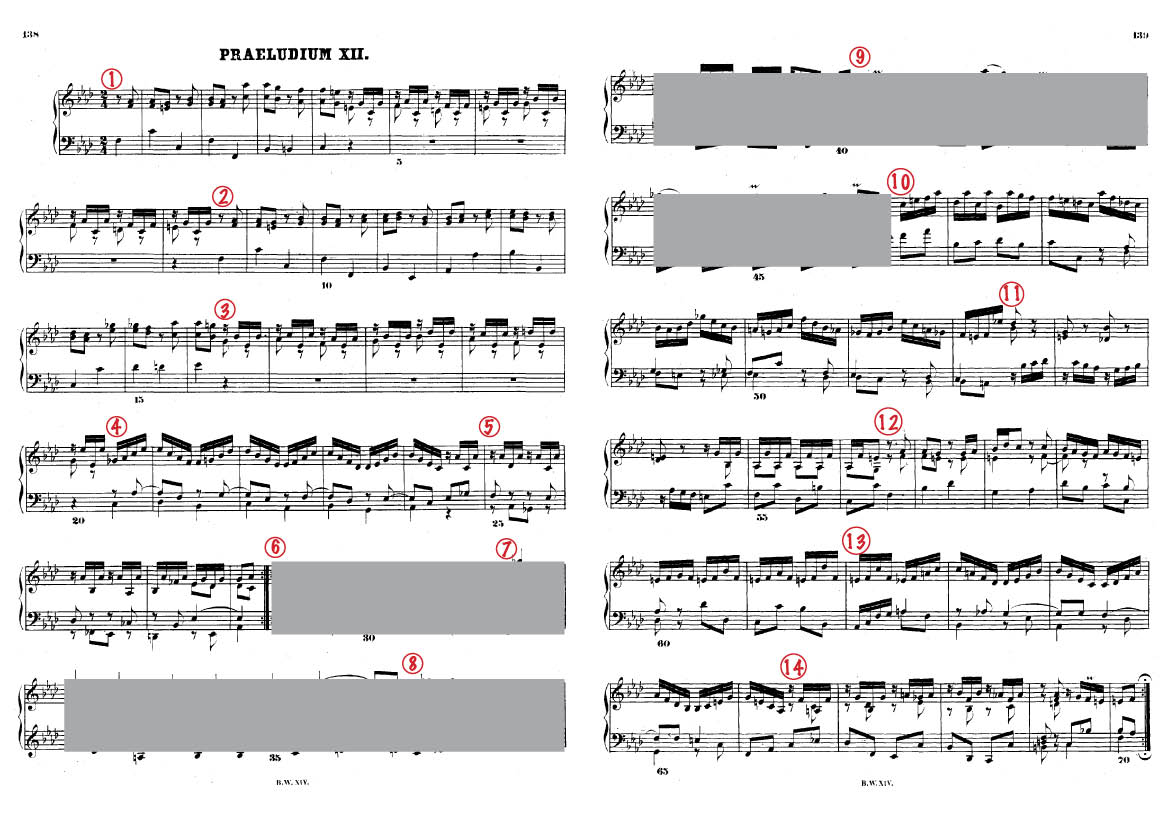
Eventually the sections meet in the middle which can be very satisfying after all that hard work. If students continue practising in this way, they’ll get more and more confident with their piece until they really know it.
They won’t just be able to play the music – they will know it inside out. They won’t just be acquaintances, but the best of friends. This intimate familiarity can result in the most enjoyable and rewarding experience of music.
Practice Instructions
When students are problem solving during their practice time, they can be more efficient and productive during their (often limited) time at the instrument.
There are lots of ways we can get students to start thinking about new ways of tackling specific problems, and no one way will work for everyone. So it’s important to have lots of tools at the ready.
Practice Strategy Sheets
I like to include level-appropriate practice instructions at the back of all my students’ assignment folders.
For my young students, that means the Piano Parent Practice Guide and the Beginner’s Practice Feedback Loop.
As students mature and grow as musicians, however, they need to develop strategies they can apply to all sorts of repertoire. For that, I give them a sheet with more detailed steps for various strategies to address problems with rhythm, dynamics/expression, tempo, and more.
I frequently refer to one of these strategies in their assignment notes so they start to learn which strategy to apply to which problems.
Vibrant Music Teaching members can instantly download my own practice strategy sheet as part of the Practice Pro course. If you haven’t checked out Vibrant Music Teaching lately, head over to the membership page to see all the new amazing things we keep adding for our members!
Piano Practice Mashup
A piano practice mashup is great to use when a student is just starting to learn about practising more thoughtfully for the first time.
At this point, it’s more about getting into the mindset of using different practice strategies – regardless of whether a particular strategy will solve a particular problem. The mashup makes students think about the music in a new way, forging new connections in their minds.
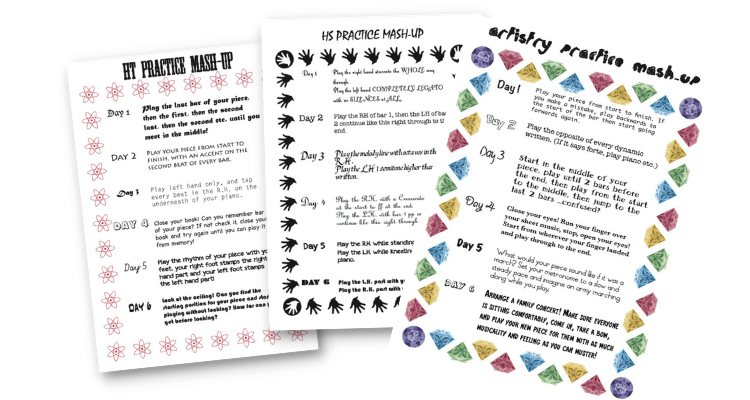
Try giving these students a sheet with 1 or 2 different piano practice strategies to try each day for a week. Be sure not to make your practice mashup sheets too “kiddy” so they’re suitable for teenage and adult students, too.
Levelling up!
Some students are good at breaking their piece up into sections and have every intention of using creative, productive practice strategies to tackle a brand new piece. But the minute they encounter a section they can’t sightread, they freeze.
Everything you went through together in their lesson flies out of their head.
You can’t be there every day to walk your students through the learning process, soup-to-nuts, but this method has been a great remedy for students who look at a page and are stuck with “How do I get started?”
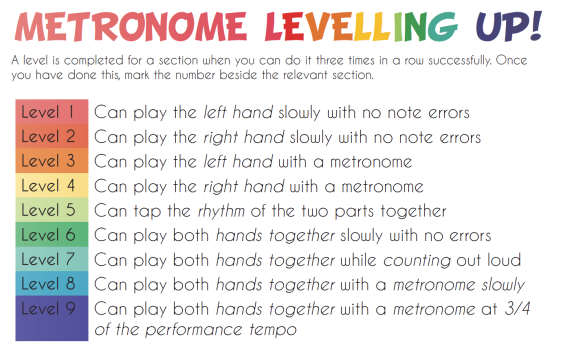
When I want a student to work in this way, I help them to split their piece into sections and then paperclip the sheet to their piece so they can’t avoid it.
Create some “Level up!” sheets of your own based on whatever your students are working on. I like to have one sheet based on a metronome or drumming track, and another for students who struggle to memorise pieces.
Practice Steps Stickers
For some students, all the practice sheets or assignment details in the world aren’t going to make a difference because these students just. don’t. read. them.
For many piano students, inventive practice strategies like practice kids and weekly mashups are fun and engaging…for others, they just seem to get in the way.
When a student is over-scheduled, over-stressed or easily over-whelmed, they may need a more straightforward approach.
Even if we carefully walk through an effective practice session in the lesson together, and have a conversation about what we did, these students still don’t reliably follow through at home.
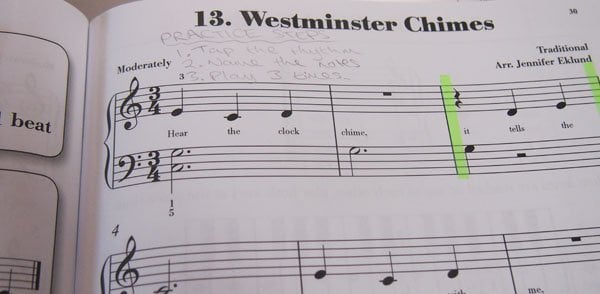
In my continual quest to find a solution to reach these students, I started writing down the steps on top of their piece as we discussed them. Now the information was all right there on the same page, removing all barriers to following the process.
This was a bit of a lightbulb moment. Students started coming back the next week, sitting down in the lesson and automatically following the piano practice strategies without me even nudging them. It was clear this had finally seeped into home practice.
As this idea developed, I turned some of the most common practice steps into stickers. That way I can just pop them on the top of a piece, and they never get lost or forgotten.
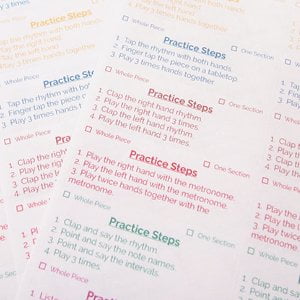
Subscribe to the newsletter and get the practice step stickers.
Enter your details to subscribe to the newsletter for piano teachers with information, tips and offers.
I hate spam as much as you do! I will only send you emails related directly to piano teaching and you can unsubscribe at any time.
Vibrant Music Teaching members, you can access the Practice Steps Stickers in the VMT Library. Not a member yet? Find out more about becoming a member.
Tests
How can you be sure that a piece is ready? It doesn’t matter what you’re preparing for; it’s always easier to play a piece in the comfort of your own home, on your piano.
In Philip Johnston’s book ‘The Practice Revolution’ (which you should definitely read if you haven’t already…did I mention I love this book?!) he talks about subjecting a piece to various “tests”.
These piano piece tests are designed to be much tougher than just performing a piece ever will be, no matter what the circumstances. When you’ve passed these piano piece tests, you can be confident that nothing will shake it.
For ease of use in lessons, I turned some of my favourite tests from ‘The Practice Revolution’ into cards which I can paperclip to my student’s piece to remind them of the rules.
When that student comes to their next lesson, their challenge is to be able to pass the assigned test on whichever section I pick at random.
Test #1: The Lap
In this test, the student has to start from a random spot and complete a “lap” back to that spot. This is a great remedy for those students who get completely stuck if they make a mistake.
These students want to go back to the beginning every time. With ‘The Lap’ you build confidence in the complete piece – not just the first few bars.
Here are the steps I have on my test card for ‘The Lap’:
- This is a test for a full piece.
- Choose a random starting spot – anywhere other than the actual start.
- Play from this starting spot through to the end, then from the beginning up to the starting spot – completing a full “lap”
- As you go, take a mental note of how many errors you make as you play and where they were, then fix the errors individually before continuing.
- The first time you play, the “error quota” is 5.
- If your errors were over your error quota, repeat the process with the same error quota.
- If your errors were under your error quota, repeat the process with a lower error quota. (If the last go allowed 5 errors, now can only have 4).
- Continue this process until your error quota is zero. If you have a lot of trouble reaching a zero error quota, put this game on hold and go back to practicing in individual sections.
Test #2: The Ledger Assessment
‘The Ledger Assesment’ is a great antidote for I-played-it-better-at-home-itis. I have many students with this affliction!
To be fair, it’s always at least partly true. Students are more nervous, it’s a less familiar piano and someone is watching. But a very big part of I-played-it-better-at-home-itis is simply that they played it better at home a few times and they’ve forgotten all the times they played it poorly.
I tell my students that if it took them 10 times to get something right, that means they played it poorly 9 times and correctly once. Which are your fingers more likely to remember?
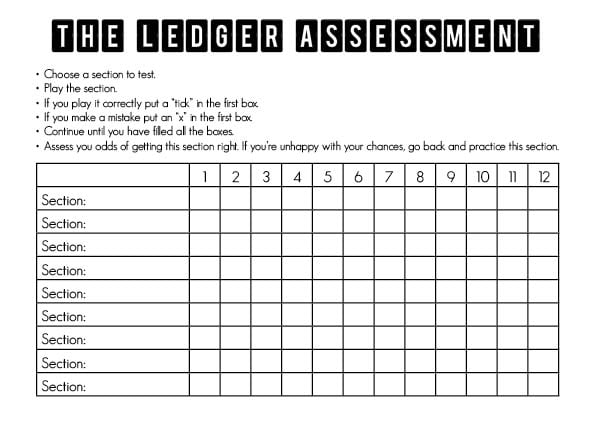
For students who seem to struggle with this concept, ask them to run through ‘The Ledger Assessment’.
If they get a section it right on one go out of ten, they have a 10% chance of playing it right from now on. Your fingers don’t just remember the last attempt!
Test #3: The Great Race
When a student’s confidence confidence level just doesn’t match their playing, ‘The Great Race’ might be just the ticket.
You know the ones I’m talking about – you ask if they’re ready for the recital and you either get “Not at all, I’m so nervous!!!” or “Yes of course!”. These students just do not have a good self-awareness; they can’t really hear their own playing.
Here’s what I have on my test card for The Great Race:
- Choose one section of your piece to test.
- Roll the dice.
- Play your chosen section.
- If you play it correctly, you get the points. If you make a mistake, your “opponent” gets the points.
- The first one to reach 30 points is the winner.
- If you win, the section passed!
- If your opponent wins, that section needs some more practice.
If you play The Great Race and you are under-confident, it will gradually increase your confidence levels. If you do this test and you are over-confident, then your opponent will just win – very, very quickly.
Test #4: The 7 Stages
In ‘The Practice Revolution’, this game is called “The Seven Stage of Misery”. While I think this is a super fun name, for some of my students it would just tip them over into not practicing this way. So I just call it ‘The Seven Stages‘ (and let them discover the misery themselves!)
Here’s how I describe The Seven Stages to my students:
- Start at Stage 1.
- Play through your selected section.
- If you play with no mistakes, move up a stage.
- Continue moving up one stage with every correct repetition.
- BUT WAIT! If you make any mistake at all, move back down one stage.
- The test is passed when you reach “Home”.
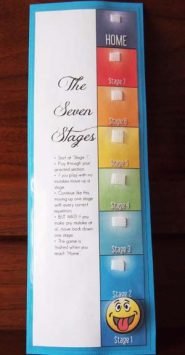
For my own students, I’ve turned this test into a game board by making a page with little squares, laminating it and adding some velcro so they can move a smiley face up and down the stages. It makes the ‘misery’ of the test a little more bearable, if you ask me 🙂.
More Practice Strategies
If you like the way I approach these practice strategies, you’ll love the Vibrant Music Teaching course The Piano Practice Physician’s Clinic, which members can take at any time.
In this course there are sixty four “cures” for different practice ailments, with videos detailing each of the practice techniques, printables, a workbook to follow along and – best of all – a community.
You’re not alone in the course. You have the opportunity to ask questions and discuss the practice ideas with me and other teachers in our private Community Forum, exclusive for members of Vibrant Music Teaching.
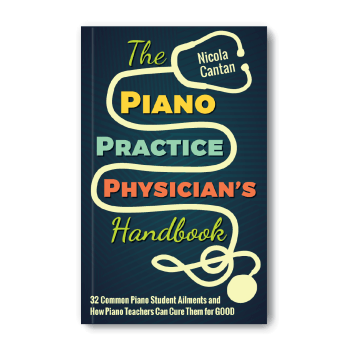
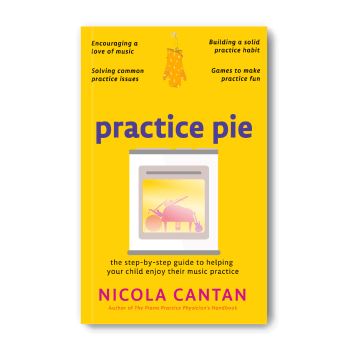
If you’re not a VMT member, you can still grab your copy of The Piano Practice Physician’s Handbook from Amazon. While you’re there, you might want to check out Practice Pie too – a great practice reference for parents.
What are your favourite piano practice strategies?
I’d love to hear your go-to practice tip in the comments below. 🙂
For more resources and ideas about improving your students’ practice habits, check out my Piano Practice hub page.
Hi Nicole! I’ve tried to go to piano physician.com/awesome for your wonderful freebie, but once I enter all my information and push send, it says that it is not working. Any thoughts?
Love your work, and enjoy all that you do!!
Sorry Vicki! This is quite an old link and goes through my old email system. Unfortunately I’m not able to fix this for you right now, but if you email me I can send you a link.
Hi Nicole! same problem here. would love the link. Here’s my email:
amberchiang@yahoo.com
Thanks!!!
I’ve added a link in the post. 🙂
The practice problems you have targeted seem to revolve around the timing factor. This is a bit of a pernicious element because beginners are less likely to notice it… especially when they are attempting to sing along with the piano. Often their rhythm of play will adjust to the singing tempo of which they are most comfortable, and the reality is that if you can’t keep a straight 4/4 timing then all of the other punctuated timing elements (that can make or break a song) will be lost.
Thanks for sharing the article and video.
3 of them are about tempo/rhythm yes, but 2 cover other areas. The lyrics suggestion is not the original lyrics – it is ones you design together and sing lots together. This makes it more likely that they will get the correct rhythm and retain it. It’s not the only solution to rhythmic issues, just one of many strategies to try.