The Vivid Practice app doesn’t look like any other music practice app you may have seen. We’ve completely rethought what a music studio practice app should look like, and come up with four different evidence-based practice “modes” that will help your students level-up their practice results.
Whether you’re new to practice apps or you’ve used them in the past, the 4 modes in the Vivid Practice app will revolutionise your students’ practice results.
Blocked Practice
“Blocked practice” is the simplest practice mode. It’s easy to understand as it’s what most students do instinctively.
Once students tap “Blocked” they will see a list of all the pieces and exercises they need to do. They can tap on each item to see their teacher’s notes and any attachments such as audio or video files.
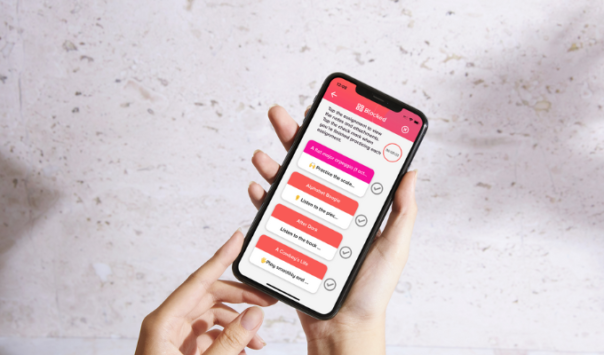
Once they’ve finished practising something, they tap the checkmark beside it. They can tick items off their list in any order. Once they’ve finished them all, the app will close the practice session and go back to the home screen.
I tell all my beginner students and younger students just to use “Blocked” mode when they’re first using the app. I only suggest the other modes once they’ve been practising consistently with the app for a few months.
Interleaved Practice
Interleaved practice has been proven to be one of the most effective ways to practise in many studies. The idea of interleaved practice is to do shorter chunks of work on each item so that you can revisit them many times in a practice session. I like to think of it like a lasagne where the pasta is your Sonatina, the cheesy sauce is your scales and the filling is your 12-Bar Blues.
Interleaved practice is not for the faint of heart. Once you’re working on one thing, it’s really tempting to keep hammering away at it until you “get it”. Interleaved practice feels uncomfortable and counterintuitive, even though it is more effective.
This is where the Vivid Practice app can help piano students. When students tap “Interleaved”, they’ll see a list of all their pieces and exercises. They then need to choose which items they want to practise (they need to choose at least 2). The app gives them 4 minutes to work on each item, showing them the notes and attachments for that thing. At the end of 4 minutes, it automatically switches, at random, to another item from their selection.
Before you ask, there’s no magic to 4 minutes. It’s just long enough to work on a specific problem in a piece or exercise, but not long enough that you can drift into mindless repetitions. The point is to train students to think about making the most of their practice time, as well as getting more comfortable with interruptions and task-switching.
Pomodoro Practice
You may have heard of Pomodoro as a productivity technique. The most common setup is to have 25 minutes of work followed by an intentional break for 5 minutes. It’s helped many people who struggle with procrastination to curb their habits and improve their focus.
That’s not quite what we’re doing here, though. When it comes to the Vivid Practice app, the goal of the Pomodoro mode is to force music students to take breaks which gives them time to reflect and digest.
When piano students tap on “Pomodoro” in the practice app, they are first asked to choose a total amount of time for their practice session. Then they choose the increments they want for their “on” and “off” time: two minutes on and one minute off, three minutes on and one minute off or four minutes on and one minute off.
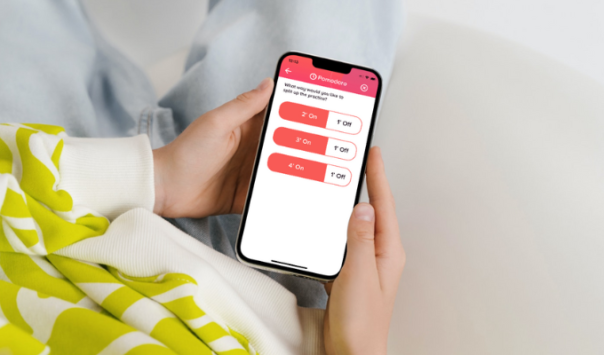
Then their practice starts. They’re shown all their pieces and exercises and can tap in to see the teacher notes and attachments (much like Blocked mode). When it’s their “off” time, they’re encouraged to take a break. They can use this time to do some breathing exercises, look out the window or noodle around on their instrument.
Focused Practice
“Focused mode” is for those times when the student has a TOP priority and they need to put in some extra work on one of their assignments. It operates similar to Pomodoro above, with on and off time, but it defaults to 4 minutes on, 1 minute off.
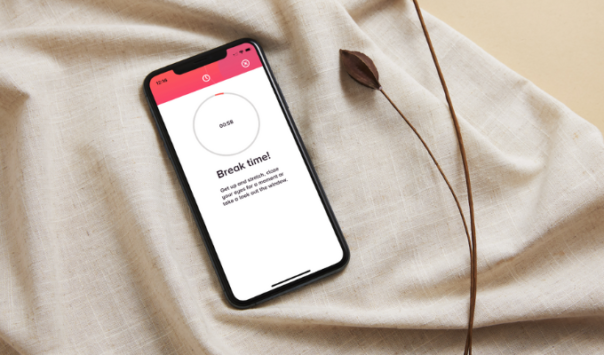
I was very intentional about building this break time into the Focused mode as well, because I know that when students are under pressure, that’s when they tend to perform panicked repetitions. They feel like they’re getting lots of work in, but it’s often counterproductive as they don’t give themselves space to think and strategise. Even worse than that, I’ve seen students cause themselves an injury because they were so set on getting a piece perfect for a big performance.
4 Vivid Practice Modes for Different Scenarios
Those are the basics of our four practice modes, and what each can be used for. Remember, start your students with the Blocked mode and show them exactly how it works. You can demonstrate the other modes to them, one at a time, as and when they’re ready. There’s no rush.
Which practice mode are you most excited about? I’d love to hear about it in the comments. 🙂